
Let’s face it: Bathroom renovation is a messy business. The space tends to look a whole lot worse before it gets much better. A while back, we shared the bathroom design process for three spaces within our clients’ Arlington Colonial. Now we’re offering a behind-the-scenes look at the renovation of those spaces, from demolition to installation. Follow along as the bathrooms transform from ugly ducklings to shimmering swans.
Every bathroom re-do should balance form and function — and we added plenty of both to these spaces. But the stars of these makeovers are our tile selections and designs. We hope you agree!
Guest Bathroom Renovation
The en-suite guest bathroom needed a major refresh. We were able to retain the existing tub (it was in good shape since the space is not used on a daily basis). But everything else was ripped out.
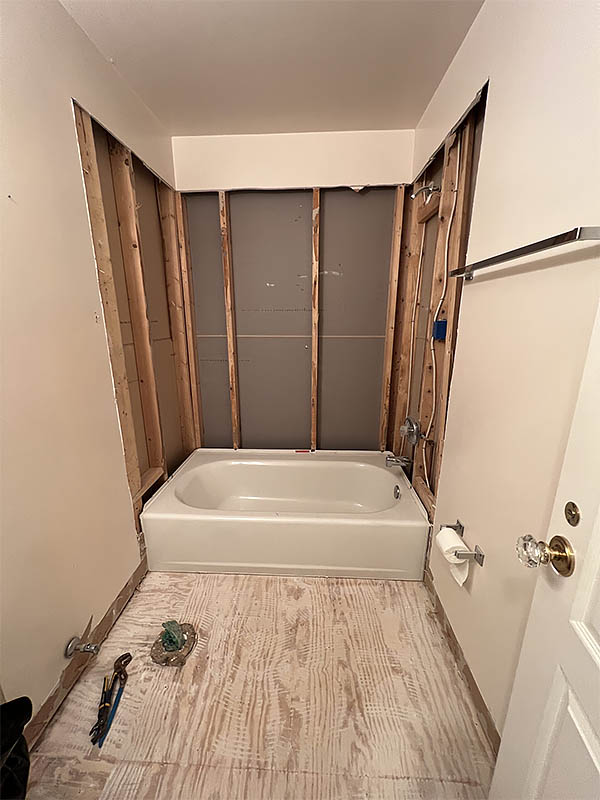
With the other outmoded elements gone, we started the transformation process. The first step is always to waterproof the tub/shower area. We rely on Schluter’s KERDI BOARD (the orange product shown here) to get the job done. Pro tip: You don’t want to take any shortcuts when it comes to waterproofing and construction materials during a bathroom renovation.

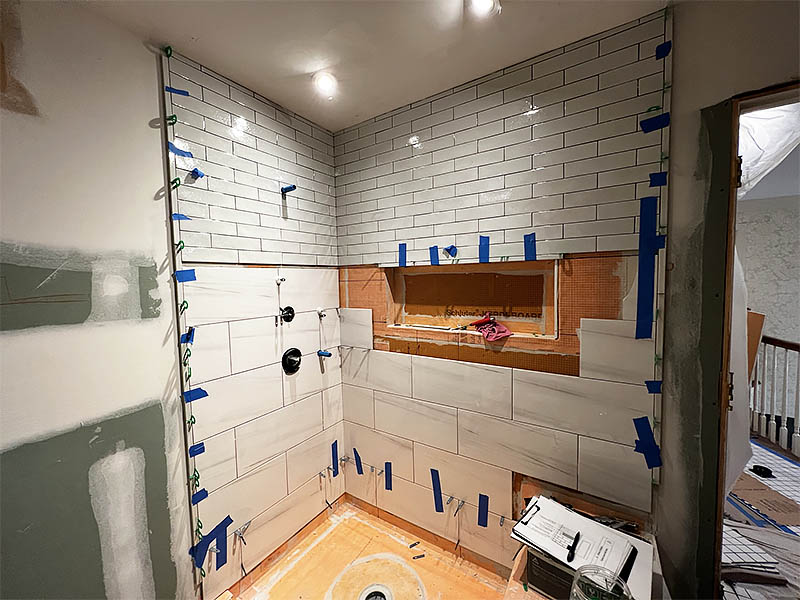
Next, the tile started going up. We opted for a vertical application of an elongated, white subway tile to add unexpected interest. We added a shower niche as a functional upgrade and ultimately turned it into a beautiful moment, with the help of a Zig & Zag glass tile from Lunada Bay Tile. Our top-notch bathroom renovation contractor, AshMeg, Inc. (lead by David Jorgenson) skillfully cut the tile on-site.

You can see the transformation taking shape here. The green spacers ensured a consistent layout of the vertical wall tile before grout was added.

Here’s a closer look at the end result. I love how the vertical installation of the subway tile turned out. The accent tile in the niche provides a bonus layer of color and texture.

Pro Tip: Always use a solid stone or quartz, rather than grouted tile, for a niche shelf and/or shower seat. This move facilitates water run-off and provides extra insurance if water pools on these horizontal surfaces.
Hall Bathroom Makeover
There are lots of moving parts to any bathroom renovation — and this hall bathroom re-do was no exception. This elevation drawing helped us keep all the various elements straight and ensured that all team members were on the same page.

The drawing shows the team which tile selection goes where. It even includes the grout color. Nothing is left to chance. And here’s a sneak peek at the actual tiles specified above:

From top to bottom, the selections are: Lunada Bay Shinju Smooth, Kushi color; Lunada Bay Shinju Liner, Kushi color; and Bianco Dolomite marble tiles. A great big thank-you to Michele Fick at B&F Ceramics for helping with these stunning selections.
This is where we started after demolition in the shower area, with the new rough-in plumbing in place:

After installing the Schluter waterproofing boards, we started laying the tile. The large-format Bianco Dolomite marble tiles came first…

…followed by an elongated subway that mimics rippling water up above.
Pro Tip: Mixing two tile sizes on the shower walls is an easy way to up the wow factor; it can also save on labor costs, given that large-format tile is less labor-intensive to install.
For even more oomph, we chose an opaque-glass, hexagon tile from Luanda Bay for the newly added shower niche. Here’s a look at it, being held up next to paint samples we taped to the wall:

And ta-da! Here is the shimmery tile adorning the functional niche:

The little pop of color and interest in the niche elevates the overall look of this hall bathroom.
Lower-Level Bathroom Renovation
Of the three bathrooms we overhauled in our clients’ home, the lower-level space required the heaviest construction. Previously, there were three points of entry to the bath — one from the hallway and two additional doors, each leading to a guest bedrooms. We closed off the Jack-and-Jill doors, so the bathroom now better serves the whole lower level (with added privacy).
The renovation plan also included converting the standard-issue tub to a luxurious shower experience. This is what it looked like before:

We flipped the plumbing to the other end and replaced the side wall you see here with a knee wall topped with glass. The bathroom feels much lighter as a result.
The elevation drawing highlights our tile selections for the new shower, as well as an added shower bench and niche.

You can see our plan coming to life here and how removing that partition wall helped to open up the space.

For the shower walls, we chose a picket-style tile from Lunada Bay in a shimmering blue-gray hue. It lends a moody, masculine vibe to this lower-level bath.

A marble-like surface from Cambria tops the new shower bench. Pro Tip: Use remnants from your vanity countertop slab for the bench top, niche shelf, and shower threshold.

The close-up below wonderfully captures the iridescent quality of the picket tiles, which enhances the luxurious feel of this bathroom.

And here’s a little peek at the bar tile we selected to give the niche an extra dose of style.

The selections for the shower floor and niche are from the same tile family but take different shapes.
Bathrooms with Style
What I love about these three bathroom renovations is that each space has its own personality — yet they share a complementary, updated-traditional aesthetic. And each received a functional upgrade during the process as well. Sure, renovating can be messy, but the end result (or results, in this case) is well worth it. The Big Reveal will be coming soon.
This home is now ready to receive holiday guests in style. We hope you’re celebrating the season in style too! Sending our very best wishes for the happiest of holidays.

 Bathroom Design: Scheming and Planning for Three Spaces